Installation
Table of contents
- Requirements
- Downloads
- Standalone (runnable jar)
- Demo
- Docker
- AWS EC2
- AWS Elactic Beanstalk
- Azure
- Google App Engine
- Tomcat
- Kubernetes
- Cloud (Custom)
- Google Marketplace
- AWS Marketplace
- Azure Marketplace
- Snowflake Data Marketplace
Requirements
- MySQL 8.0
- You can use your own instance (Docker, Standalone, Cloud)
- Java 11
- https://adoptopenjdk.net/releases.html
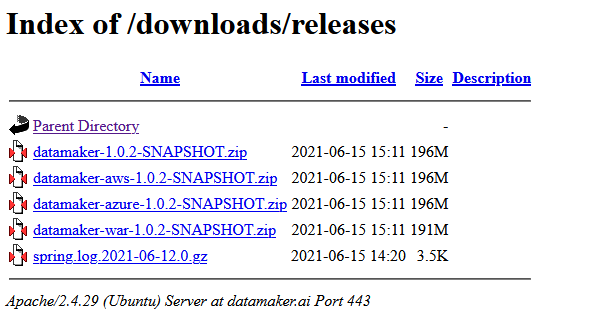
Downloads
- Download the archive from here: https://www.datamaker.ai/downloads/releases
- Use your company/user credentials (contact support if you didn’t receive it yet)
- Use your company/user credentials (contact support if you didn’t receive it yet)
- Use the latest version for your target architecture
- default: self-contain service
- azure: Application Service deployment
- aws: Elastic Beanstalk deployment
- gcp: Google Cloud Platform
- war: Tomcat or J2EE container deployment
- tar: Docker image
Standalone (runnable jar)
- Download default version from downloads site: datamaker-${VERSION}.zip
cp datamaker-*.zip /optcd /optunzip datamaker-*.zipcd datamaker- Change or keep server port number:
server.port=8080 - Set MySQL database parameters in application.properties:
spring.datasource.url=jdbc:mysql://localhost:3306/datamaker spring.datasource.driverClassName=com.mysql.cj.jdbc.Driver spring.datasource.username=root spring.datasource.password=changeme ./install.sh- Open up a browser and navigate to http://server_url:8080/datamaker
- Login using admin / changeme credentials
Demo
- Download the archive from here: https://www.datamaker.ai/downloads/demo
cp datamaker-*.zip /optcd /optunzip datamaker-*.zipcd datamaker-
Change or keep server port number:
server.port=8080 - The demo version contains an embedded database. To activate, edit service.conf:
JAVA_OPTS='-Xmx512M -Dspring.active.profiles=demo -Dlogging.config=/opt/datamaker/logback-spring.xml -DLOGS_PATH=/opt/datamaker/logs' - if you want to install as a service:
./install.sh - if you want to run it on demand: java -jar -Dspring.profiles.active=demo datamaker-${VERSION}.jar
- Open up a browser and navigate to http://server_url:8080/datamaker
- Login using admin / changeme credentials
Docker
- Download the docker image from here: https://www.datamaker.ai/downloads/releases
- replace ${VERSION} by version downloaded
docker imagesdocker load < datamaker-docker-${VERSION}.tar- Change the running port number and the database connection
docker run -p 8080:8080 \ -e SPRING_DATASOURCE_URL=jdbc:mysql://${HOSTNAME}:3306/datamaker \ -e SPRING_DATASOURCE_USERNAME=root \ -e SPRING_DATASOURCE_PASSWORD=changeme \ --name datamaker datamaker:${VERSION} - Open up a browser and navigate to http://server_url:8080/datamaker
- Login using admin / changeme credentials
Docker Compose
If you want to use a docker image of MySQL as well, use this setup.
- mkdir datamaker
- create docker-compose.yml
- replace ${VERSION} by version downloaded
docker-compose.yml template
version: '3.3'

services:

  db:
    image: mysql:8
    volumes:
       - db_data:/var/lib/mysql
#       - ./init.sql:/docker-entrypoint-initdb.d/init.sql
    command: --default-authentication-plugin=mysql_native_password
    restart: always
    ports:
      - 3306:3306
    environment:
      MYSQL_ROOT_PASSWORD: changeme
      MYSQL_DATABASE: datamaker

  service:
    image: datamaker:${VERSION}
    #restart: always
    depends_on:
      - db
    ports:
      - 8080:8080

  adminer:
    image: adminer
    restart: always
    ports:
      - 8088:8080

volumes:
    db_data: {}
- docker compose up
- Open up a browser and navigate to http://server_url:8080/datamaker
- Login using admin / changeme credentials
To delete
- docker compose down
AWS EC2
AWS Elactic Beanstalk
- Install AWS cli: https://aws.amazon.com/cli/
- Download Amazon version from downloads site: datamaker-aws-${VERSION}.zip
- Configure:
aws configure -
Upload artefacts to S3 bucket
aws s3 mb s3://elasticbeanstalk-datamakeraws s3 cp datamaker-aws-1.0.5-SNAPSHOT.zip s3://elasticbeanstalk-datamaker - Create instance profile
aws iam create-instance-profile --instance-profile-name aws-datamaker-ec2-role{ "InstanceProfile": { "Path": "/", "InstanceProfileName": "aws-datamaker-ec2-role", "InstanceProfileId": "AIPA557JKSZV2JRYHDS5D", "Arn": "arn:aws:iam::957730166379:instance-profile/aws-datamaker-ec2-role", "CreateDate": "2021-10-13T18:07:05+00:00", "Roles": [] } } -
Copy the Arn value and paste in the next section under IamInstanceProfile option
- Create config file: options.json
[ { "Namespace": "aws:autoscaling:launchconfiguration", "OptionName": "IamInstanceProfile", "Value": "arn:aws:iam::957730166379:instance-profile/aws-elasticbeanstalk-ec2-role" }, { "Namespace": "aws:elasticbeanstalk:application:environment", "OptionName": "LOADER_PATH", "Value": "/home/webapp/conf/jar" }, { "Namespace": "aws:autoscaling:launchconfiguration", "OptionName": "InstanceType", "Value": "t2.large" }, { "Namespace": "aws:elasticbeanstalk:application:environment", "OptionName": "SPRING_PROFILES_ACTIVE", "Value": "amazon" }, { "Namespace": "aws:elasticbeanstalk:application:environment", "OptionName": "LOGS_PATH", "Value": "/home/webapp/datamaker/logs" }, { "Namespace": "aws:rds:dbinstance", "OptionName": "DBAllocatedStorage", "Value": "5" }, { "Namespace": "aws:rds:dbinstance", "OptionName": "HasCoupledDatabase", "Value": "true" }, { "Namespace": "aws:rds:dbinstance", "OptionName": "DBUser", "Value": "root" }, { "Namespace": "aws:rds:dbinstance", "OptionName": "DBPassword", "Value": "changeme" }, { "Namespace": "aws:rds:dbinstance", "OptionName": "DBDeletionPolicy", "Value": "Snapshot" }, { "Namespace": "aws:rds:dbinstance", "OptionName": "DBName", "Value": "datamaker" } ] -
Create an elastic beanstalk
aws elasticbeanstalk create-application --application-name datamaker --description "Datamaker Testing Suite" -
Create application version
aws elasticbeanstalk create-application-version --application-name datamaker --version-label v1.0.5 --description datamaker-v1.0.5 --source-bundle S3Bucket="elasticbeanstalk-datamaker",S3Key="datamaker-aws-1.0.5-SNAPSHOT.zip" --auto-create-application -
Create an environment
aws elasticbeanstalk create-environment --application-name datamaker --environment-name datamaker-prod --version-label v1.0.5 --solution-stack-name "64bit Amazon Linux 2 v3.2.6 running Corretto 11" --option-settings --option-settings file://options.json - To enable authentication: see Cognito
Azure
- Install Azure cli: https://docs.microsoft.com/en-us/cli/azure/install-azure-cli
- Download Azure version from downloads site: datamaker-azure-${VERSION}.zip
- Login
az login - Create (or reuse) a Resource Group:
az group create --name web-datamaker-westus-prod-01 --location westus - Create Azure MySql: https://docs.microsoft.com/en-us/azure/mysql/quickstart-create-mysql-server-database-using-azure-cli
az mysql server create --resource-group web-datamaker-westus-prod-01 --name datamaker-mysql --location westus --admin-user root --admin-password <server_admin_password> --sku-name GP_Gen5_2mysql -h datamaker-mysql.mysql.database.azure.com -u root@datamaker-mysql -pCREATE DATABASE datamaker;
- Create a webapp:
az webapp create -g web-datamaker-westus-prod-01 -p MyPlan -n datamaker - Deploy package:
az webapp deploy --resource-group web-datamaker-westus-prod-01 --name datamaker --src-path datamaker-azure-1.0.5-SNAPSHOT.zip --type zip - Override configuration settings:
az webapp config appsettings set -g web-datamaker-westus-prod-01 -n datamaker --settings SPRING_PROFILES_ACTIVE=azure SPRING_DATASOURCE_URL=jdbc:mysql://datamaker-server.mysql.database.azure.com:3306/datamaker SPRING_DATASOURCE_USERNAME=psuuzsetwp@datamaker SPRING_DATASOURCE_PASSWORD=changeme LOGS_PATH=/home/LogFiles/Application - More info available here: https://docs.microsoft.com/en-us/azure/app-service/deploy-zip?tabs=cli
- Open browser to: https://datamaker.azurewebsites.net/datamaker
- Login using admin / changeme credentials
- To enable authentication: see Azure AD
Google App Engine
- Install Google Cloud SDK: https://cloud.google.com/sdk/docs/install
- Download Google version from downloads site: datamaker-gcp-${VERSION}.zip
- Login
gcloud auth login - Create an App Engine app within the current Google Cloud Project :
gcloud app create --region=us-central - Deploy package:
gcloud app deploy your-executable.jar - Open browser to: https://
.appspot.com - Login using admin / changeme credentials
- Monitor the logs:
~/google-cloud-sdk/bin/gcloud app logs tail -s default
Tomcat
- Download WAR version from downloads site: datamaker-${VERSION}.zip
- Upload the war inside the directory: $CATALINA_HOME/webapps
- You can also use deploy using the Tomcat Manager (needs configuration)
- Create setenv.sh in $CATALINA_HOME/bin
- Override Spring configuration:
JAVA_OPTS="$JAVA_OPTS -Dspring.profiles.active= -Dspring.config.location=classpath:/,file:/home/datamaker/conf/jar/" SPRING_DATASOURCE_URL=jdbc:mysql://127.0.0.1:3306/datamaker SPRING_DATASOURCE_USERNAME=root SPRING_DATASOURCE_PASSWORD=changeme - Restart Tomcat
- Open up a browser and navigate to http://
/datamaker - Login using admin / changeme credentials
Kubernetes
Coming soon
Cloud (Custom)
Coming soon
Google Marketplace
Coming soon
AWS Marketplace
- Log into AWS Console
- Navigate to EC2 service
- Launch a new instance
- Select AWS Marketplace
- Search for Datamaker

- Configure your instance and create it
- See here for more info
Azure Marketplace
Coming soon
Snowflake Data Marketplace
Coming soon